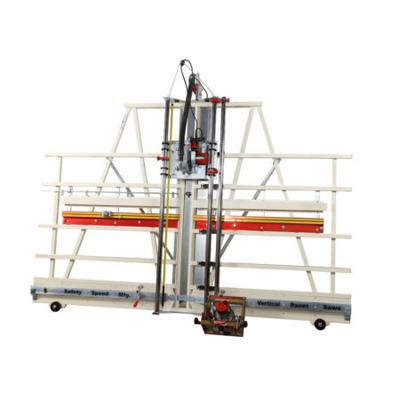
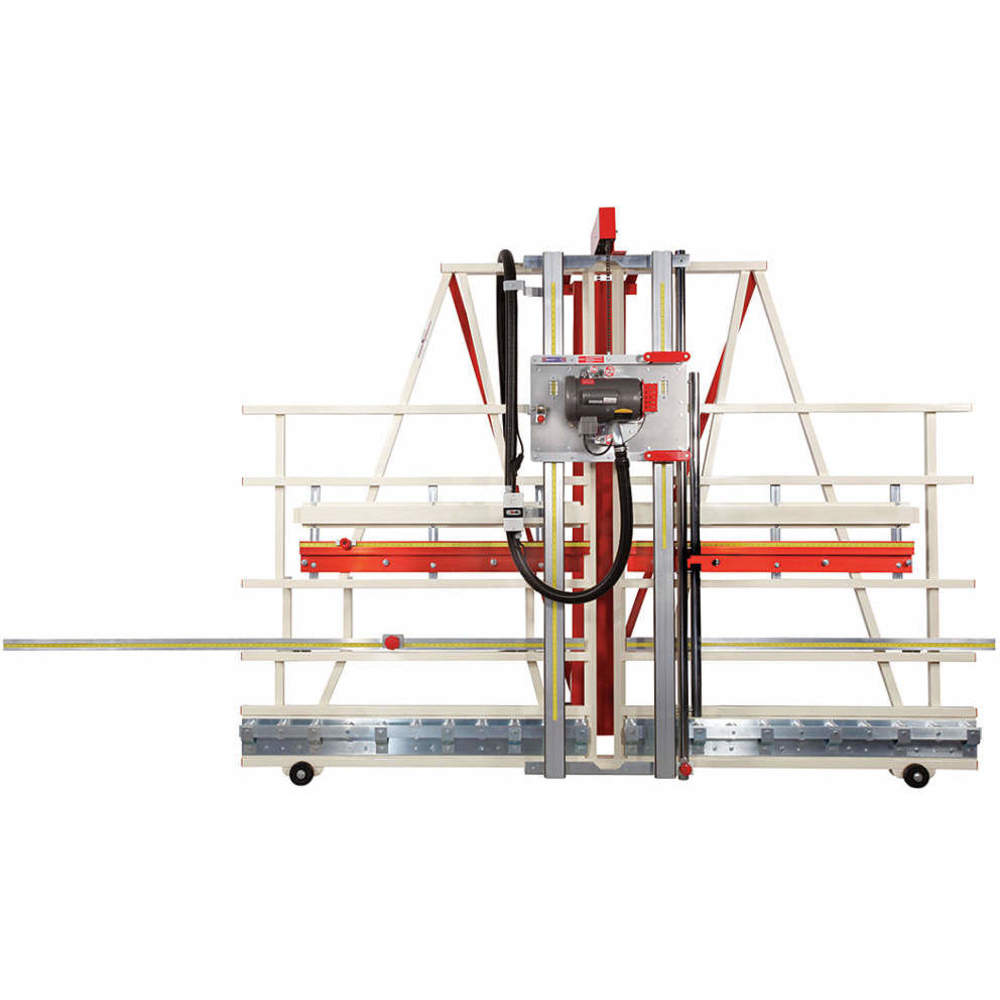
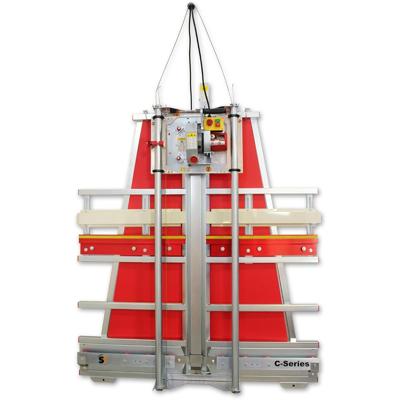
Sign In

SAFETY SPEED

For over 60 years, Safety Speed Manufacturing has been delivering vertical blade panel saws and routers for various industrial needs. The company is headquartered in Ham Lake, Minnesota, USA. Read More

Filter

Power Tools

Adhesives Sealants and Tape

Machining

About Safety Speed

Safety Speed catalogue includes panel saws, circular saw blades, belt sanders and accessories. The brand's panel saws provide a safe and fast solution for processing panels. They have heavily guarded saw blades to keep users from unwanted contact. Safety Speed wide belt sanders are available in single and three-phase units and provide a working width of up to 42 inches. Their large belts account for increased capacity, less heat accumulation and fewer belt replacements.

Things To Consider

Cross-Reference Alternatives

Safety Speed MPNs cross individual references to the equivalent Kett Tools, Milwaukee and Saw Trax model numbers for panel saws and related accessories. So, if you're looking for a competitor item that is either out of stock or obsolete, chances are Raptor Supplies has the equivalent Safety Speed products available.

Shipping

These Safety Speed products range from small to large sizes. They may require careful packaging as some items might get damaged while shipping. Hence, these items are delivered by courier shipment and air freight for minimum downtime.

Major Trade Names

Safety Speed Competitive Advantages

SR5 Panel Saw / Router

This combination saw / router allows quick cutting or routing applications by quickly changing from a saw to a router in 30 seconds. It comes with a patented self-adjusting router carriage and two dado stops to provide consistent depth of cuts and has an integrated dust collection system for removing dust and debris. They feature an adjustable floating router head that can be moved up / down for routine grooves, slots and other shapes on wood or other materials.

Frequently Asked Questions

How to operate C4 Panel Saws?

  • Set up the saw by adjusting the height and angle of the blade and the fence, which is the guide that helps to keep the workpiece in place.
  • Also, adjust the blade guard, which is a safety feature that covers the blade and prevents the operator from accidentally touching it.
  • Once the saw is set up, load the sheet of material onto the saw table, making sure it's properly aligned with the fence and the blade.
  • Now turn on the saw and push the material through the blade, using the fence as a guide to ensure a straight cut. During the operation, the saw blade spins at high speed, slicing through the material and creating a smooth, straight edge.
  • Once the cut is complete, the operator removes the cut piece and repeats the process for the remaining sheets of material.

How to maintain Glue Pot Edgebander?

  • Regularly clean the glue pot after each use to prevent the glue from hardening and clogging the nozzle or the heating element.
  • Use a scraper or a brush to remove any excess glue and wipe the pot with a cloth dampened with a solvent or mineral spirits.
  • Always check the adhesive to avoid overheating or burning the glue. Add more glue as needed.
  • Set the glue pot to the correct temperature for the type of adhesive being used. Check the Adjust the heat as needed to ensure that the glue is melted and flowing properly.
  • Inspect the glue nozzle for clogs or other damage that may affect the flow of glue onto the workpiece.
  • The heating element of the glue pot should be cleaned and inspected regularly to ensure that it is functioning properly. Check the wiring and connections for any signs of damage or wear and replace them if needed.

How to adjust the dado stops in the SR5 panel saw / router?

  • Before using the dado stops, install the appropriate blade or bit on the saw / router.
  • Determine the depth of the cut you want to make and adjust the blade accordingly.
  • Once the blade is set to the correct depth, engage the dado stops by sliding them into place. The stops should be positioned in such a manner that the blade comes in contact with the stops at the desired depth.
  • When the stops are properly set up, test the cuts. As the blade reaches the depth of the stops, these stops will engage and prevent the blade from cutting any further.
  • Check the depth and fit of the dado joint to ensure it meets the requirement. If necessary, make adjustments to the blade depth or position the stops correctly to achieve the desired results.

Brand Exclusive Products